
How To Use Wireless Mouse Without Receiver
Every modern household consists of either a desktop computer or a laptop. These devices make our lives easier. A mouse is an input device that makes using a desktop computer or a computer effortless. Earlier, wired mouse were the most commonly used, but as technology is advancing, wireless mice are taking over the wired mouse.
These wireless mice provide a better user experience, whether they are used for educational or professional usage. Even gamers opt for the wireless mouse as they do not have cables which need mouse bungees, so their hand movements are not restricted.
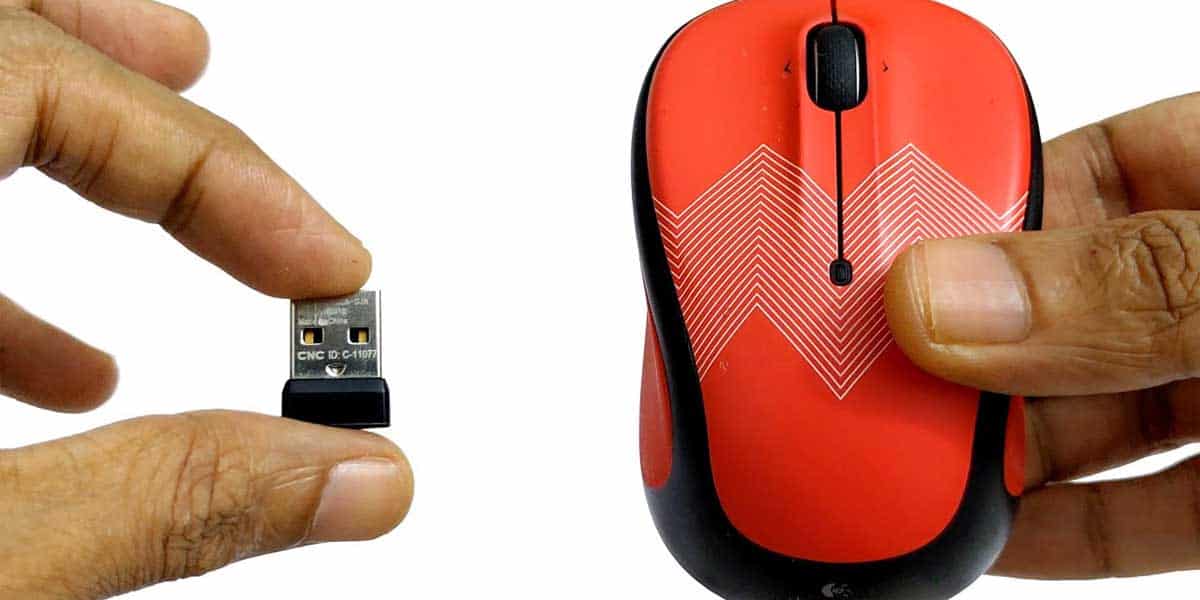
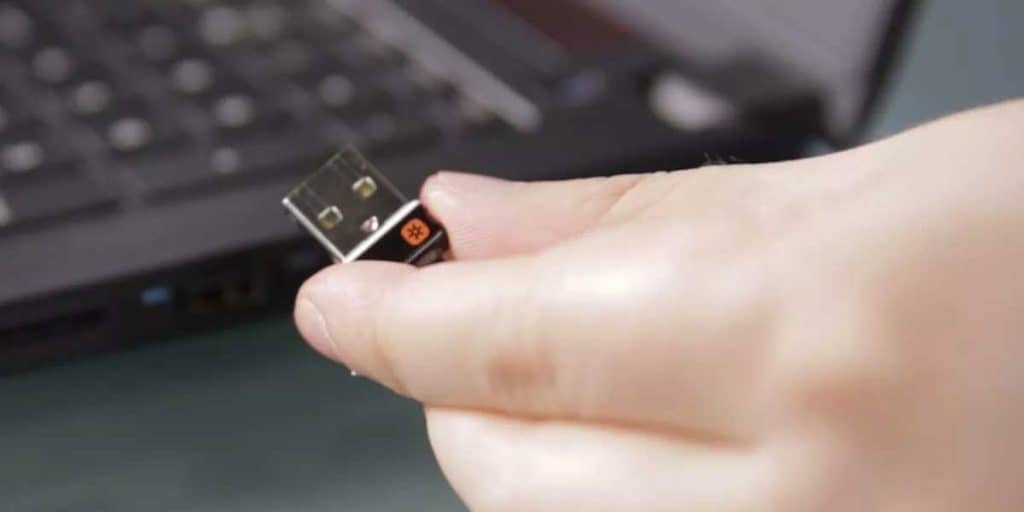
The wireless mouse comes with a USB receiver that you have to connect to your device to use the mouse. Now many wireless mouse users want to know “How to use a wireless mouse without a receiver?” If you are one such user, then this article will be helpful for you.
How To Connect A Wireless Mouse Without USB
Connecting a wireless mouse without a USB to your desktop computer or laptop is simple. The procedure to connect the wireless mouse without USB for each operating system is different. Just follow the steps mentioned below according to your operating system.
1. How To Connect A Bluetooth Mouse Without The Receiver
Most wireless mouse comes with a USB receiver that connects the mouse to your computer device. But if your desktop computer or laptop already has Bluetooth, your wireless mouse can connect to your device directly. There is no need to use the USB receiver. If you want to connect your wireless mouse, follow the steps given below:
Also Read: Best Ergonomic Mouse
I. Connecting A Bluetooth Mouse To Windows
Many users use HP’s wireless mouse. Most of these users doubt how to how to connect HP wireless mouse without a receiver. In few steps, you can use your mouse without a receiver. The first step is to ensure that you connect the mouse to your desktop computer or laptop.
This is an approach that relies on the wireless mouse board transmitter and communicates with the Bluetooth radio on your desktop or laptop.
The Bluetooth feature has been one of the latest computer technology advancements and can be found easily on tablets and laptops but not on most desktop PCs. To check whether your desktop PC has a Bluetooth feature or not, go to the control panel or device and printers. If you do not have Bluetooth on your desktop PC, you need to purchase a Bluetooth adapter.
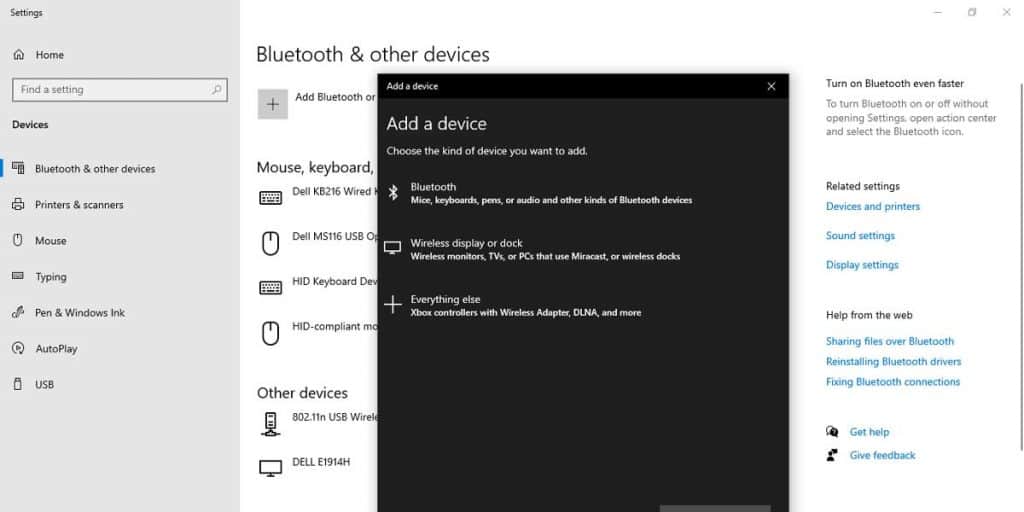
Step 1. Go to “Settings” on your computer. Go to “Devices” underneath your search in Settings. From there, choose “Devices.”
Step 2. From the menu, which has lots of options, select “Bluetooth and other devices.”
Step 3. By clicking “plus sign” (+) next to the option “Add Bluetooth or other devices,” you can connect a new Bluetooth device to your desktop or laptop.
Step 4. A new dialog box will appear after this, where you have to select “Bluetooth.”
Step 5. After this, the “Add device” function begins, and all you need to do is follow the instructions.
Step 6. Select the device which you want to pair.
Step 7. Now your wireless mouse is connected for a smooth experience, just download all the necessary drivers.
II. Connecting A Bluetooth Mouse To Mac
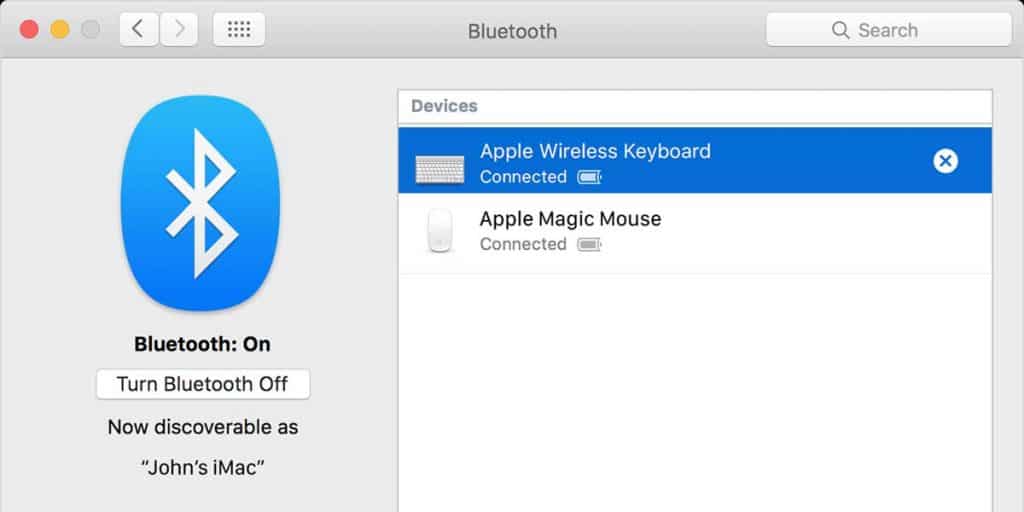
The approach to connecting your wireless mouse to your Mac operating system is significantly different from a Windows operating system.
The process of pairing the wireless mouse is the first thing you need to. Just refer to the guidelines for the device if you find the process difficult.
Select “Apple” from the menu and navigate to “System Preferences” on your Mac computer. A dropdown box will appear after you select it. In the dropdown box, the “Bluetooth” function will appear. Proceed with the pairing process by clicking on it.
Bluetooth will start searching for Bluetooth devices that are open to the pair at this point. Pair the Mac computer with the mouse after you have found an open mouse Bluetooth.
III. Connecting A Bluetooth Mouse To Linux
You should launch a Bluetooth device panel from the desktop screen. Seek the top of the screen ad switch, then ensure that it is on.
The next thing is to begin your wireless mouse pairing process. This isn’t straightforward, so you have to refer to instructions for your gadget for guidance.
A list of devices is dropped. To complete the sequence deletion process, drag your mouse. This process is designed, so it takes 20 seconds to complete. You will suffer a timeout if you fail to complete the task within the time allowed. Whenever you connect your mouse to the device, you will be notified that the mouse is “Connected.”
2. How To Connect A WiFi Mouse Without The Receiver
A wi-fi-based mouse requires a particular connection to its USB transmitter. When you compare this to the Bluetooth-based mouse, it doesn’t require a specific connection to the USB transmitter. You can not connect a Wi-Fi-based mouse directly to your devices’ Wi-Fi rather than the Wi-Fi dongle because they both have different frequencies.
Therefore, it has become necessary to connect the Wi-fi-based mouse to its respective Wi-fi transmitter. This is a major drawback of a Wi-fi mouse. The pros of this mouse are that they provide longer battery life, are more reliable, and provide higher response time.
Also Read: What is Angle Snapping?
3. Using A Unifying Receiver To Connect WIFI Mouse
Unifying receivers are a very useful and helpful device that allows us to connect six compatible devices to one computer using just a single receiver. These devices can be mice, touchpads, keypads, and trackballs. Pairing devices to a Unifying receiver is similar to pairing a Bluetooth device. These receivers can be identified with a Unifying logo on them.
You will first have to install Logitech’s Unifying Software to connect new devices to your existing Unifying receiver. The Unifying software should already be installed on your PC if you have already installed the newest version of Logitech’s SetPoint software.
You may get a stand-alone version of Unifying Software from the Logitech support site if you don’t need the customizing capabilities of SetPoint. If you want to connect more devices to unifying receivers, just follow the steps given below:
Step 1. Start by launching the Logitech Unifying Software from the Windows Start Menu.
Step 2. You can also launch the Logitech Unifying Software by clicking on the Unifying tab in SetPoint and then clicking on the “open Unifying software” button.
Step 3. Once the Logitech Unifying Software welcome window comes up, click on the “next” button to begin the pairing process.
Step 4. Follow the on-screen instructions to pair your new Unifying product by turning the power switch off and then back on.
Step 5. When your new device is detected, you’ll see a confirmation message asking you to verify that the new device is functioning properly.
Step 6. Once you’ve verified that the new device is connected, select “yes” and then click on the “next” button to continue.
Step 7. If your new Unifying device did not pair correctly, you could restart the pairing process by selecting “no,” followed by the “next” button.
Step 8. Your new Unifying product should now be paired with your existing Unifying receiver.
Step 9. Click on the “Finish” button to close the Logitech Unifying Software.
Step 10. If you would like to pair additional Unifying devices, you may do so by clicking on the “Pair another device” button to restart the pairing process.
Although up to six separate devices can be connected to a unifying receiver, only one receiver can be coupled with a Unifying mouse or keyboard. A single Unifying product can not be combined with several receivers at the same time.
Things To Keep In Mind Before Trying To Connect The Mouse
There are certain things that you need to take into consideration before you try to connect your mouse to your device.
1. Distance
Wireless mice are different from the wired mouse in various aspects. When you try to connect your wireless mouse to your PC or laptop, make sure the distance between the mouse and the device should be small.
The maximum distance at which the mouse can be used is specified. For a proper connection and fast response, the mouse should be in the range of 33 feet from the device. The connection will be broken if you take the mouse beyond this specified range.
2. Power
For any electronic device to work properly, it requires a constant source of power. Therefore, for efficient performance from your mouse, make sure it has an adequate power source. This is also necessary because each function of your device consumes a different amount of power.
Replaceable batteries and rechargeable batteries are used to power these mouses. To avoid any issue with the power source of the mouse, either keep extra batteries or the charging cable of the mouse. Modern wireless mouses can run without any battery replacement or charging for months.
3. Supported Devices
The wireless mouse supports specific devices. There are mouses that are manufactured exclusively for one device. There are also mouses that support more than two or more devices. Therefore, before buying a wireless mouse, gaming mouse or any other mouse, you should verify whether it will support your device or not.
4. Pairing pin
Whenever you want to use your wireless mouse, you have to pair it with your device. This pairing is done using a unique pin called Pairing pin. Be very careful when you enter the pin. The pin is not required most of the time, but you can click on the ‘accept’ button to confirm the right pin.
Also Read: Gaming Mouse Vs. Regular Mouse: The Real Difference
Conclusion
You can definitely connect your wireless mouse with a USB transmitter. But for this, your device should have a Bluetooth function. If it doesn’t, then you have to use the USB transmitter. The wi-fi-based mouse can not be used without the USB because of the reason mentioned above. The steps are given above to use a wireless mouse with a USB transmitter according to your operating system, which will help you.
FAQ
1. Can You Use A Different Receiver For A Wireless Mouse?
2. Do All Wireless Mice Need Receivers?
3. How To Setup A Wireless Mouse?
Step 1. Drag the battery cover off the mouse bottom and insert the batteries into your wireless device.
Step 2. Buy a wireless adapter compatible with your mouse type.
Step 3. Install the provided mouse driver software.
Step 4. Turn on the mouse and let the computer find the device.
4. Where Is The Connect Button In A Bluetooth Mouse?
5. Can I Pair Multiple Devices With Bluetooth?


“Every modern household consists of either a desktop computer or a laptop.”
What?